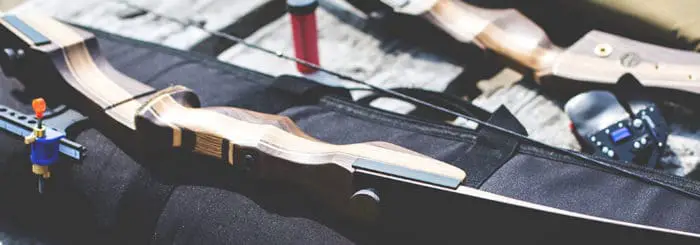
Takedown recurve bows almost push one-piece recurve bows completely out and became really common with beginner to advanced archers. They are convenient and comfortable in ways the alternatives just aren’t.
In this post, we’re going to discuss what takedown bows are, their pros and cons, and how to choose a takedown recurve.
Takedown recurve bows are recurve bows that are set up out of a riser and two limbs. They’re a preferred choice of many archers because they are easy to dismantle and assemble, which makes them much easier to transport and maintain than standard recurve bows.
If you’re new to archery and looking for a good starter bow, I’d really suggest going to for takedown recurve. In my opinion, their benefits far overweigh their downsides, especially for beginners.
But they’re not only for beginners. Nowadays most Olympic archers are using takedown recurve bows – they really fit all skill levels.
In any case, let’s begin by detailing the pros and cons of takedown bows, so you can see if they fit your needs.
Note: Some of the links on this page are affiliate links. This means that if you buy through one of them, I’ll earn a small commission, at no additional cost to you. It’s a great way to support the website.
Advantages of takedown bows
Portability and storage
The whole reason takedown bow came to be, is so they can be broken down to multiple, easy to store and transport, pieces. They can be packed into a much smaller case than one-piece bows.
I mean, have you seen a one-piece recurve bow? They’re pretty massive, though not as big as traditional longbows. Carrying a full size recurve bow in a hardshell case is more difficult than it seems.
Most dedicated bow cases have room for the three pieces to comfortably sit in place. The small cases are really comfortable to store or travel with. I’ve noted in a previous post about traveling with archery gear that many airlines have restrictions regarding the size of your bow case, so you’re much less likely to have issues traveling with a takedown bow rather than a one-piece recurve.
It takes some work to take down the bow: you first unstring it using a bow stringer, unscrew the bolts that hold the limbs on the riser, and take the bow apart. Nothing too complicated though – it takes some practice, but you’ll quickly be able to do it with your eyes closed.
Adjustability
Different limbs give the bow different features. For example, the stronger the limbs are, the heavier the draw weight of the bow becomes. Longer limbs increase the draw length of the bow. The material of the limbs can really affect the behavior of the bow.
Since you can change the limbs on a takedown bow, you can basically choose its material to enjoy the different advantages, for any archery style.
If, for example, you decide to try a higher draw weight, all you need to do is get limbs to fit your new weight. One-piece recurve bows don’t have this feature – they have one set draw weight.
Nowadays, with ILF (international limb fitting) risers, there’s a standard for limb sizes and shapes. This means that if you get an ILF riser, you’ll basically be able to get any ILF limb and they will fit perfectly, no matter who’s their manufacturer. ILF bows are usually more expensive than standard takedown bows though.
The ability to change the configuration of the bow makes it much more versatile.
Maintenence
Another great feature of takedown bows over standard bows is that you can replace any damaged part of the bow. This comes handy in a lot of cases and can save you a lot of money in the long run.
For example, if one of the limbs of the bow gets damaged, instead of buying a whole new bow or spending a lot of cash on repairing it, you’ll just buy a new limb. Obviously, the same goes for a damaged riser.
When you take the bow apart often, there are a lot more chances for you to easily maintain it. You get to know the bow better, and recognize when you need to maintain it.
Price
It’s surprising that takedown bows are typically cheaper than one-piece recurve bows. Bows are not cheap, and that’s just another reason takedown bows become more and more popular these days.
And the affordability doesn’t just come with the initial price tag. Maintenance and care costs, which I detailed already, come much cheaper on these bows. In many cases where you’d spend a lot of money fixing a one-piece bow, you’ll just have to replace a limb for a much lower price.
Quality takedown bows are generally very durable. With some love and maintenance, your bow will serve you for many years and stay in good condition.
Overall, choosing to go for a takedown bow is a really cost-effective decision.
Disadvantages of takedown recurve bows
More complex handling
Takedown bows require some assembly work. Tightening the screws, adjusting the limb and lining everything up often leaves room for mistakes. If you’re not doing everything correctly, you just might end up with a cracked limb or worse.
If you’re choosing to go for one, you better make sure you’re perfectly setting it up every time you shoot.
I think this video shows everything you have to do when dismantling in a really clear way:
In any case, it’s a good idea to get help from a more experienced archer the first time you want to take the bow apart. You need to learn how to properly destring and restring the bow, and how to perfectly set it up.
Aesthetics
It’s really a matter of personal preference, but many people find takedown bows less stylish and aesthetic. Most one-piece bows have a lot of time and effort put into their craftsmanship, and they’re usually very impressive looking.
Overall, I think the benefits of takedown bows far outweigh their downsides. Getting a good ILF bow is a good choice in my opinion.
How to set up a takedown recurve bow?
Correctly setting up your takedown bow is really important. A bow that isn’t properly bolted, for example, can crack under the tension. But assembling the bow isn’t that complicated if you know what you’re doing.
You can watch this informative video where they perfectly detail how to set the bow up.
The things you need to have are your riser, two limbs, the bolts, and the string. You also need a bow stringer to set it up. Let’s discuss the steps to set the bow up:
The first thing you’ll do is to attach the limbs to the riser. Make sure you’re putting the correct limb at the correct spot. The bottom limb typically has writing on the back. Of course, the limbs should curve forward.
Use your hands to tighten the bolts. Make sure they’re properly holding the limbs in place, but that you’ll be able to unscrew them later.
You’ll now string the bow. take the string and place it on the bow. The smaller loop will go on the bottom, and it should fit on the groove. The bigger loop will go past the top groove, on the limb itself.
Now place the bow stringer, the bottom part on the end of the bottom limb, and the top part below the top loop of the bowstring (closer to the riser).
Use your legs to step on the bow stringer, and pull the bow upwards. The bow will curve, allowing you to slide the bowstring top loop to the groove. You can now release the tension and remove the bow stringer.
Now your bow is basically ready to go. You do need to attach any accessories you want to use, like your sight and arrow rest.
To dismantle the bow, you’ll simply follow these steps in reverse order. So you first remove accessories, then use the bow stringer to carefully remove the bowstring, and at the end unscrew the bolts and detach the limb from the riser.
I really recommend that you get the help of a more experienced friend the first time you’re setting the bow up and the first time you disassemble it.
Tips for getting a takedown bow
If I was able to convince you that takedown bows are awesome, and you’ve decided to get your own, there are still some things to consider. You should get a bow that will completely fit your needs, so here are a few tips for getting a takedown bow.
- Get a bow with appropriate draw weight and draw length. Though you can change your bows limbs to fit different lengths and weights, they should all fit you. Using a high draw weight or length can absolutely ruin your form and limit your accuracy. I already wrote with great detail on measuring your draw weight and finding your ideal draw length in previous posts.
- Consider the size of the bow. Though takedown bows pack nicely to a small case, you should still pick a bow that’s appropriately sized. Bigger bows are typically easier to aim, but smaller bows are more mobile and easy to move around with. It all depends on how you’re going to use the bow.
- Either go for brand names or recommended bows. Read and ask around. Your bow will be the major investment you’re going to make to get into archery, so you want to get the most value out of it. Paying a bit more when purchasing the bow may save you a lot of cash in the long run.
My top takedown recurve bow recommendation
I was looking around for a good takedown bow to get started with, and I found Southwest Archery Spyder Takedown Recurve Bow (link to Amazon). What I like about it is that it fits beginner archers perfectly, but it’s also designed for the archer to grow and improve with it. It comes with all the basics, but it has preinstalled room for future upgrades and accessories.
It’s a 62″ bow and it comes in right-handed and left-handed versions. It’s recommended for 22″ to 28″ draw length shooters, so if your draw length is higher, you might want to go for the XL version (link to Amazon). Overall it’s a good and affordable entry to intermediate level bow.
Conclusions
Takedown recurve bows basically took over the entire market, and are pretty much the standard nowadays. That’s for a good reason since they have many benefits: they’re comfortable to carry, easily adjustable and affordable.
If you’re starting out with archery and looking to get a recurve bow, I really think going for a takedown bow is a good choice. Try to consider things like draw weight, draw length and the size of the bow before you make a purchase. I really believe you’ll have a great experience if you get one. Hope this post helped!
The Best Recurve Bows I’ve Reviewed
Southwest Archery Spyder
This entry to intermediate level, traditional looking takedown recurve bow is one of these bows you can grow with. As a mid-sized, 60″ tall bow, with draw weight between 20-60 lbs and draw length between 22″ to 29″, it’s perfect for beginners.
Bear Archery Grizzly
This high-end alternative is, in my opinion, the best option for more experienced archers. As a shorter bow 58″ tall, lightweight recurve bow, it’s very mobile. Its draw weight between 40-60 lbs, which is perfect for most experienced archers. The beautiful maple wood the riser is made of is also very durable, and generally, it’s made of high-quality material.
Like most other things, you can find it in Amazon.
You can also read more in the full recurve bow buyer’s guide.


